

Technical details and information about the Strum Fix Plus 4
This page has technical details about the Strum Fix Plus 4 installation, usage, modification and troubleshooting. As always, contact guitar@bytearts.com if you have any questions.
Purchasing
You can order the SFP4 by going to our store page.
Guitar Compatibility and Installation
Installation and compatibility is the same as the Strum Fix Plus 2 (and 4), requiring you to open up the guitar and connect a pair of wires. No soldering is required.
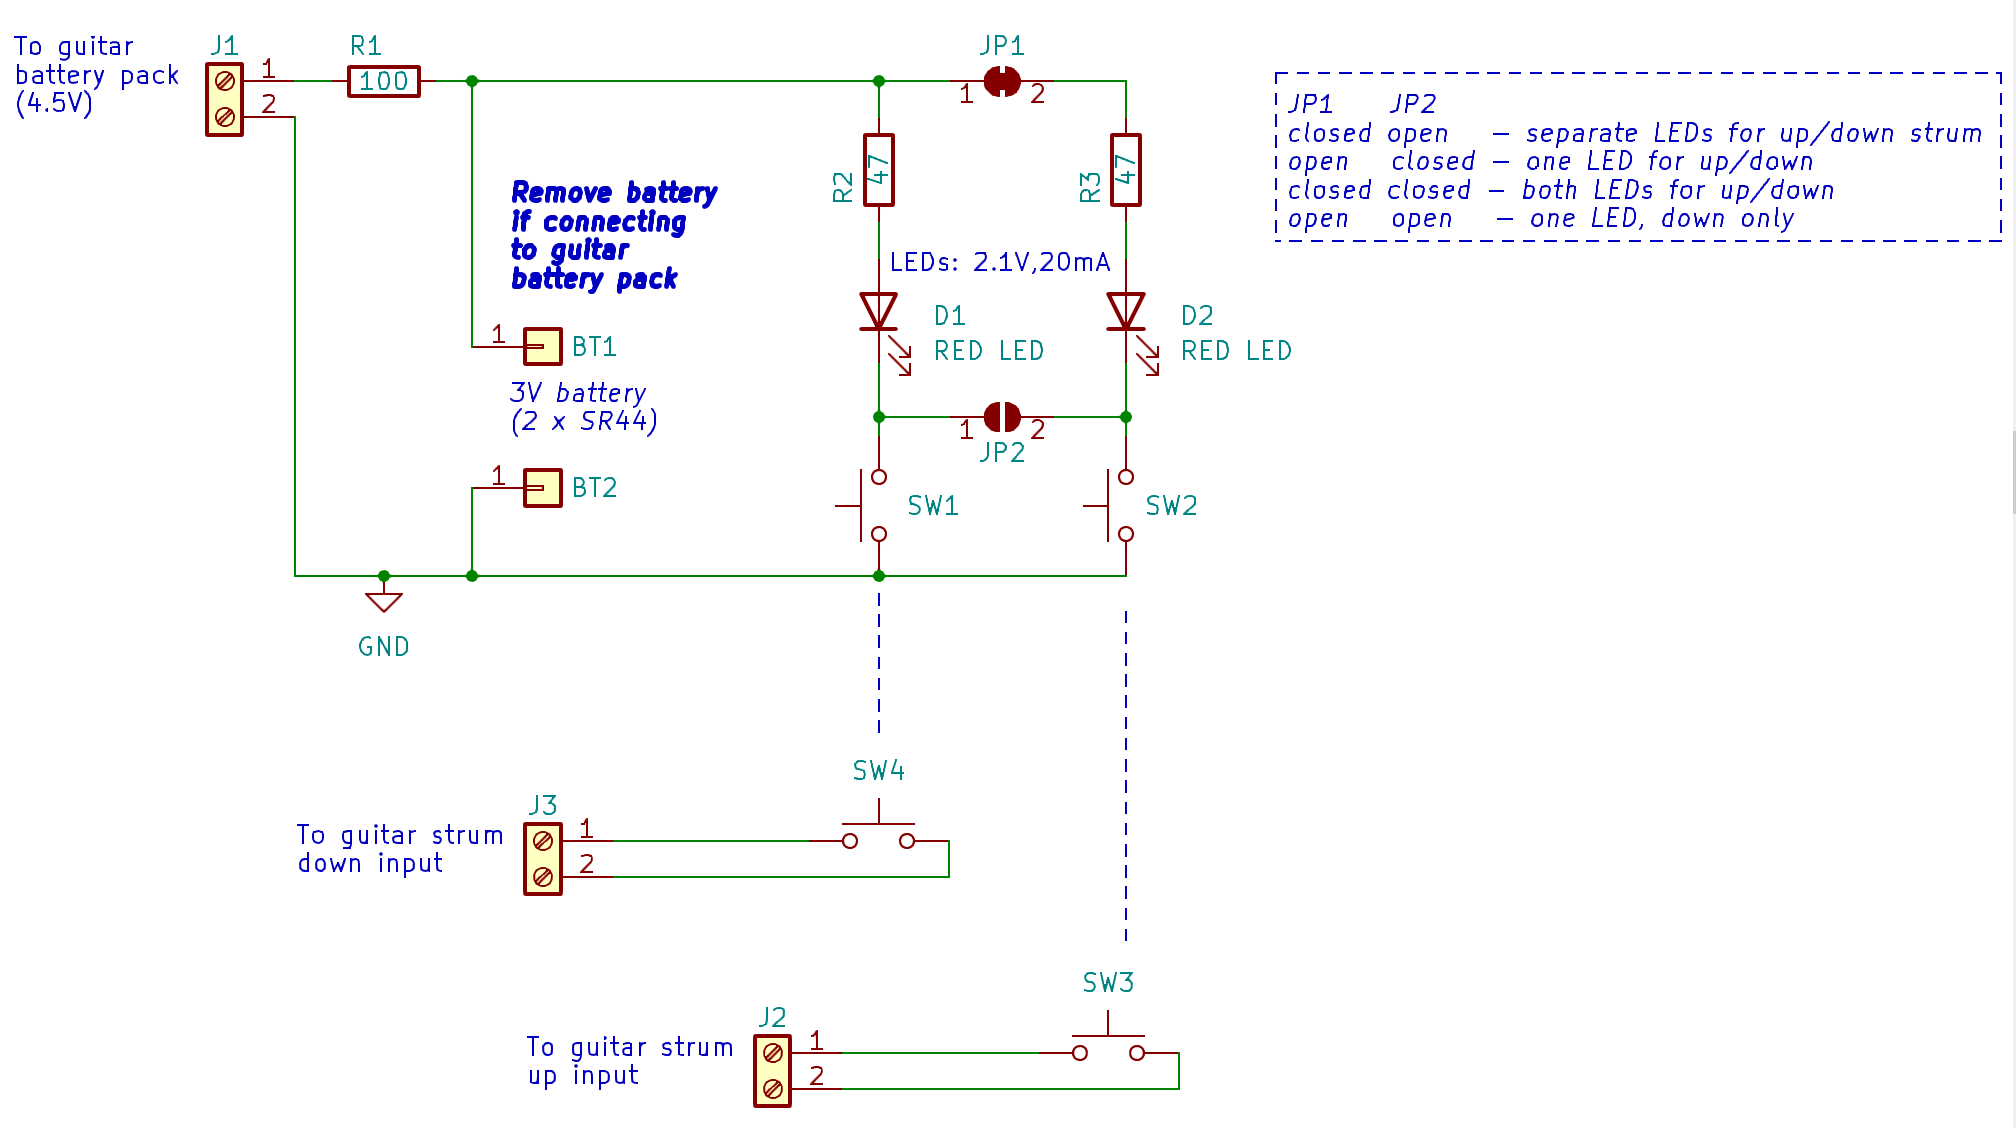
It is possible to wire the SFP4 so that it draws power for the LEDs from the guitars batteries instead of the on-board batteries, but this does require some soldering. See the schematic below and/or contact me at guitar@bytearts.com for more info.
Schematics
The SFP4 uses all thru-hole components, so if you know how to solder it’s fairly easy to replace any parts (to change the colors of the LEDs for example).
There are also some solder “jumpers” on the circuit board that can be modified to change the operation of the LEDs.
The schematic below shows all the components and jumpers on the SFP4 circuit board. The default jumper configuration is for separate LEDs for up and down strums.
Starting in April ‘24 we are shipping SFP4s with one RED LED and one AMBER LED, and also changed R2,R3 to 100 Ohms to decrease the brightness slightly.
3D Files
Currently the only file available is for the strum bar, so you can print different colors or make modifications as desired. The other parts are printed using high-resolution resin printers and so require some special materials and handling.
SFP4 Strum Bar CAD model. We print these in clear PLA with supports.
